Blog Moved

Hello my lovely readers!

Even though I have been somewhat erratic in updating this blog, I seem to have acquired a few followers – which is fantastic!

However, as a busy Mum, I have been spreading myself too thin.  So I am consolidating my blogging efforts and concentrating on my main blog, which you can find at:

www.lifeaftertwobluelines.com

I will be continuing to blog recipes over there at LATBL, as well as my usual musings and updates on motherhood.  Please do follow me over there if you wish to keep reading my work.

Thanks and I hope to see you over there! 🙂

Super Easy Homemade Coconut Oil Moisturiser

Tags

, , ,

Ever noticed that when you apply moisturiser, it seems to seep into the skin and disappear?  Has it ever occured to you that this means that every ingredient in your moisturiser is sinking into your cells and bloodstream?

I really started thinking about this recently.  I wouldn’t take a big spoonful of commercial moisturiser – especially not after reading the ingredients list that reads like the contents of a chemistry lab.  And yet, I allow it to be absorbed into my skin, where it reaches my cells much more directly than if I ate it (in which case it would be filtered by my liver and kidneys).

It has not been defined by science how much skin can absorb, however it seems clear from studies so far that skin absorbs anywhere between 60-100% of what we rub on our skin.  The chemicals we absorb from our skin care has been found in all sorts of organs, not the least of which being the womb.

Makes you think, huh?  Increasingly, I am coming to view skincare as part of feeding my body, and am of the philosophy that says “If I wouldn’t eat it, why would I rub it on my skin?”

That’s why I was so excited when I came across this recipe for homemade moisturiser.  Not only does it only really contain one ingredient (with a couple of optional additions), but that ingredient is a really nutrititious food product!  How better to nourish my skin than with pure coconut oil?!

The benefits of coconut oil are so many it really deserves a post all of its own.  Just trust me on this – it’s really good stuff!  Quite apart from it’s nutritional benefits, it is also fantastic for dry and problem skin, including acne, psoriasis, dermatitis and eczema.  It is antibacterial, antiviral, antifungal and antiparasitic.

And so, here it is, a super easy, super fabulous recipe:

Ingredients:

1 cup coconut oil (preferably organic virgin oil)
1 teaspoon vitamin E oil (optional)
essential oils for fragrance (optional)

Method:

Put all the ingredients in a bowl and whip with a wire whisk.  If you have a KitchenAid or similar (drool, a woman can dream), you will find this much easier than I did.  It will thicken up and become a thick white cream.
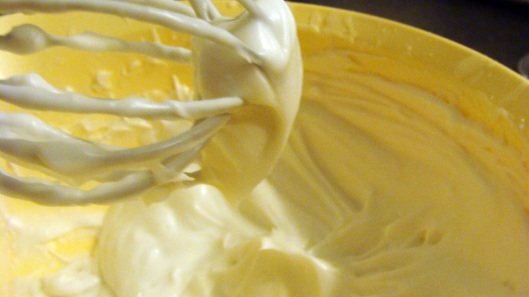
That’s it!!

I first tried to whip it with a stick mixer, but it really wasn’t going anywhere.  Once I got out the wire whisk, it just took a little elbow grease and it got there eventually.

The melting point of coconut oil is quite high at 24 degrees Celsius.  Therefore, once whipped, you’ll want to transfer this rather quickly to whatever container you intend to store it in.  It will set rather hard, so I recommend something fairly shallow with a wide mouth.  I actually just used a plastic takeaway container for this batch, but I intend to get a nice looking container for it next time!

I found the scent of the essential oils I used was completely overpowered by the coconutty smell of the oil, so I think I’ll just leave them out next time.

As it’s a rather chilly winter here at the moment, my moisturiser is in a kind of soft solid block on my bathroom bench.  I just scrape a bit off with my fingernail and it quickly melts into the skin with the friction of rubbing it on and the natural warmth of the body.

Apparently in the summer, it may need to be stored in the fridge to maintain it’s whipped state.

This moisturiser is SO good!  I use it on my face every day after washing, and on my legs after shaving.  You may be worried about putting oil on your face, especially if you have oily skin, but I really recommend giving it a try.  It absorbs really quickly and leaves the skin feeling lovely and soft.  I have heard people have had a lot of success with it for acne, so don’t be afraid of it if you’re pimple prone!

After I had been using it for a few days, Daddy C even said to me one day “ooh your legs are all smooth!”  I said “yeah, I shaved them” and he replied “I know, but they’re SUPER smooth!”

So there you go – if even a mere male can notice the difference, it must be good!

Not only that, I *love* knowing that I am nourishing my skin with a pure, nutritious food product, that I am completely happy to have absorb into my body.

Delish!

Very Healthy Banana Bread

Tags

, , , , , , , , ,

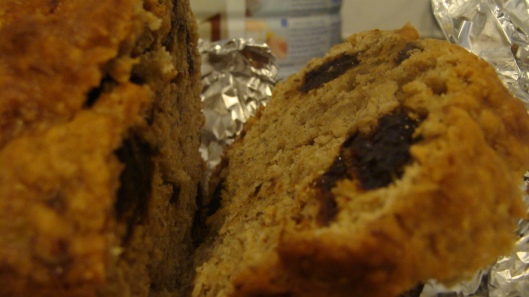
I found this banana bread recipe when looking for healthy finger foods to make for my 9 month old baby (original recipe here).  I like the recipe because I like to give my baby good, wholesome food – I liked that every single ingredient in this was healthy and I was able to make it without any added sugar.

I made this with honey instead of sugar.  If you’re used to very sweet food, you may like to make this with sugar, possibly even extra sugar.  However, I found myself going back to this bread myself for a very satisfying and guilt free snack.

It certainly passed muster with my harshest critic, who absolutely devoured it.  I should add the caveat that my little guts will devour most anything… but I do think she especially enjoyed this bread!

Ingredient Set 1:

2 cups flour (I used wholemeal, use whatever flour you like!)
1/2 tsp salt
1/2 tsp soda
1 tsp baking powder

Ingredient Set 2:

3 large very ripe bananas (about 1 1/2 cups) – mashed
2 eggs
1/2 cup brown sugar (or replace with 1/3 cup unsweetened fruit juice concentrate ormaple syrup or honey)
1/2 cup milk
zest of a lemon or orange (optional – I omited this, must try it next time!)
2 tsp vanilla or 1 Tbsp dark rum (obviously I chose the vanilla for my baby!)

Optional Extras:

1/2 cup chopped walnuts or pecans (I omitted this for bubba)
1/3 – 1/2 cup dark chocolate pieces (I omitted but must try it!)
1/2 cup chopped dates (I actually used prunes to help with bubbas bowels, actually tasted pretty good and lent a good sweetness to the loaf)

Method:

1. In two separate bowls, combine the two ingredient sets (a dry mixture and a wet mixture).

2. Mix the wet and dry mixtures together until just combined.

3. Fold in the optional extras, if desired.

4. Pour into a greased and/or lined loaf tin.

5. Bake at 180 C for about 50 minutes or until a skewer inserted into the middle comes out clean.

6. Leave in the pan for 10 minutes then place on a rack to cool.


There you have it – an easy, healthy snack easily adaptable to your tastes and/or your baby’s!

Why not have a slice hot from the oven with a generous smear of butter?


Milk Chocolate Mud Cake

Tags

, , ,

On New Years day, we were just sitting around on a lovely Melbourne day, when Daddy C said: “I feel like cake.”  Naturally, I obliged, and came up with this delicious milk chocolate mud cake (based on this recipe).  Moist, dense and muddy, and it lasted for days.  Yum!

Ingredients:

250 g milk chocolate (the better quailty, the better!)
250 g salted butter
1 tsp instant coffee granules/powder
188ml (3/4 cup) water
325g (2 cups plus 2 tablespoons) plain flour
30g (1/4 cup plus 2 teaspoons) cocoa powder
1/2 teaspoon bicarbonate of soda (baking soda)
550g (2 1/2 cups) caster sugar
4 large eggs
2 tablespoons (40ml) oil
1 teaspoon (5ml) vanilla extract
125ml (1/2 cup) buttermilk (don’t have any? You can easily make some!)

Method:

1. Preheat oven to 160 degrees celsius.

2. Grease a 23 or 24 cm round cake tin, preferably springform.  Line with baking paper.

3. Place 250g chocolate, butter, coffee and water in a large saucepan over low heat, stirring occasionally. When chocolate and butter have melted, remove mixture from heat and allow to cool to lukewarm/room temperature.

4. Sift the flour, cocoa powder and bicarbonate of soda together into a very large bowl.

5. Add the caster sugar to the bowl with the flour mixture, and stir the ingredients together until well combined. The original recipe recommends using a whisk to stir ingredients together.

6. In a medium bowl, place eggs, oil, vanilla and buttermilk.  Whisk until well combined.

7. Add the egg mixture to the dry mixture, and stir until well combined.

8. Add the chocolate mixture to the egg and flour mixture in a three batches, stirring until combined after each addition.

9. Pour into prepared pan and bake for about 1 hour and 15 minutes (24cm pan) or 1 hour and 30 minutes (23cm pan).  If a knife/skewer comes out clean or with moist crumbs (not gooey batter) attached, the cake is ready.

Allow the cake to cool in the pan and then remove.  It has a kind of crunchy top, which the original recipe suggests removing, but I thought it was awesome!

I iced this cake with Chocolate Cream Cheese Icing and it was delicious!  The cake was quite tall, so I even cut it in half and added a middle layer of icing, which I think helped it stay moist for so many days.

As a finishing touch, I grated some toblerone over the top.  Yummo!!

Chocolate Cream Cheese Icing

Tags

, , , , ,

I’ve recently discovered that some people define icing and frosting as two different things.  Where I come from, icing is what you put on a cake and frosting is considered the American term for the same thing.  So I’m going to call this icing.

Whatever you call it, it is Yummy McYumpants.  Not to mention super easy.  Once you’ve had this icing, you’ll never what that icingsugar-cocoa-butter crap again!

I got the recipe from this Masterchef recipe.  I haven’t tried the actual cake in it though so I can’t recommend it.  I do, however, recommend this yummy Milk Chocolate Mud Cake (which I will be posting soon).

Ingredients:

50 g butter, softened
250 g cream cheese
1 cup (160 g) icing sugar, sifted
1/4 cup (25 g) cocoa, sifted

Method:

Place the butter and cream cheese together in a bowl and beat until pale and creamy.

Add the icing sugar and cocoa, and beat until light and fluffy.

*******

Didn’t I tell you it was easy?!  You can use an electric beating contraption if you have one… I don’t, so trust me, good old elbow grease works too!

Oh, and the final step – smear all over a really yummy cake (and then lick the spoon.  A few times).

A Few Eggs Short Of A Sixpack?

Tags

, , ,

If you’re like me, then you have started on a recipe, got to the wet ingredients, and then upon pulling the egg carton out of the fridge, realised that you’re an egg or two short.  Or rather, I should say, if you have a partner who likes eggs for breakfast like I do.  Hurumph.

Anyway, if it happens to you, you don’t have to abandon your baking!

The most successful substitute I have found for an egg or two in baking is actually… mayonnaise!

Simply add 3 tablespoons of mayonnaise for each egg the recipe calls for.

I usually use this when I do have some eggs, but am missing one or two.  I have used it with great success, and you would never know the difference in the end result.

I have also heard of using applesauce in place of eggs, but I haven’t tried it myself.  If you have had success with any egg substitutes in baking, I would love to hear about it!

No Buttermilk? No Problems!

Tags

, ,

Buttermilk isn’t one of those baking ingredients we tend to just have lying around.  But don’t be put off making that yummy sounding recipe just because you don’t have any buttermilk (or are too lazy to go to the shop to buy some… just me?).  You actually most probably have everything you need already without knowing it.

All you need is some normal milk and some white vinegar.  I have white vinegar in the cupboard because I use it for cleaning.  It really is very handy for all kinds of stuff, I recommend having a bottle there at all times.

If you don’t have any white vinegar, you can also use lemon juice.

Put one tablespoon of the vinegar or lemon juice into a measuring cup that can hold a cup of liquid.

Add milk to make up the rest of the cup.

Leave stand for 5 minutes.  Then use as much as you need in your recipe.  Or just double it if you need more.

Done in 5 minutes and it’s cheaper than buying buttermilk too!

Creamy Blue Cheese Dip

Tags

, , , , ,

I made this blue cheese dip for Christmas day nibbles and it was a blue cheese lover’s dream!  If you don’t like blue cheese – you won’t like this dip!  But if you do… well, this is an incredibly versatile creamy creation, the uses of which are limited only by your imagination.

It is based on this recipe from the Closet Cooking blog.  While writing out the recipe, I forgot to transcribe the bit about the lemon juice… so the dip I made has no lemon juice and it was very tasty!  I look forward to trying it with lemon juice sometime to see if it’s better with or without.

Ingredients:

1/4 cup blue cheese, crumbled
1/2 cup mayonnaise
1/2 cup sour cream
salt and pepper
fresh chopped herb of choice (optional)

Method:

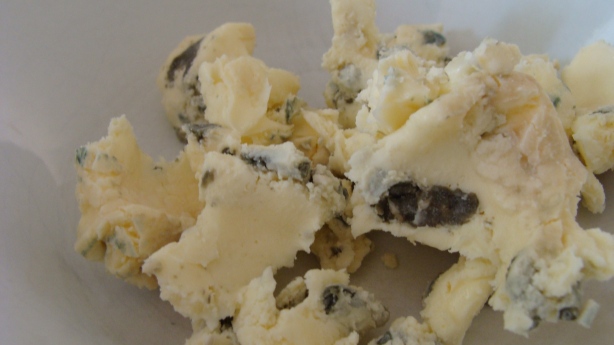
Crumble that creamy tasty moldy piece of goodness that is your blue cheese.

Add the sour cream and mayonnaise.

Add a sprinkle of salt and pepper to taste.  Mix.

At this point, you can add in your herb of choice if desired – the original recipe calls for dill, but as I didn’t have any, I just sprinkled some chopped fresh chives over the top for that zing of green colour.

As easy as that!

You can make this dip as chunky or smooth as you like, and have it with crackers, veggie sticks, onion rings, or whatever else your taste buds desire.

God I love cheese!

Easy Chocolate Truffles

Tags

, , ,

Given that these truffles are one of the things that inspired me to start up this blog, I thought it only fitting that I kick it off with them!  I made these for my partner and I to enjoy on our baby’s first Christmas day.  Having never attempted truffles before, I was delighted at how easy and yummy these were – impossible to just stop at one!  And the potential for extra creativeness is limitless – I look forward to playing around with this recipe someday.

In the meantime, here is the basic recipe for delicious, smooth, silky truffles (based on this recipe from allrecipes.com.au)

Colourful chocolate deliciousness!

Ingredients (makes 60):

250 g cream cheese, softened (e.g. Philadelphia cream cheese)
500 g (3 cups) icing sugar, sifted
375 g dark chocolate, melted
1 1/2 tsp vanilla essence

Toppings of choice (e.g. sprinkles, nuts, melted chocolate for dipping)

Method:

1. Beat cream cheese until smooth in a large bowl.  Beat in icing sugar until well blended.  Stir in melted chocolate and vanilla until no streaks remain.

2. Refrigerate for an hour.  Shape into balls.  Roll in your toppings of choice.

Done!  Easy!


I rolled mine in hundreds and thousands, chocolate sprinkles and dipped some in melted Toblerone – yum!!  I think some chopped nuts would also be a great topping.  Cocoa or icing sugar would also be worth a try.  I think you could also experiment with putting things in the middle to make a centre.

I think one of the keys to making these delicious is your choice of chocolate.  I used dark Lindt chocolate, and I’m sure using good quality chocolate made these extra yummy.

I found it was best to keep these in the fridge for a nice fudgy texture.

Enjoy!  And let me know if you discover any successful and yummy variations 🙂